Last night was a pretty exciting time in our household. A couple of months ago a life long friend of Veronica's had suggested my photographs to an interior designer by the name of Stephanie Ballard, who is the Principal Designer and Owner of Covet Living Interiors.As it turns out, Stephanie was working on a home renovation project that was going to be televised in the near future. This televised project is called Little Woman Of LA - Terra's Big House.Terra Jole and her husband Joe Gnoffo hired renovation expert Cory McCrummen and designer Stephanie Ballard to turn their residence into their dream home. After requesting a few of my photographs, Stephanie Ballard ended up using one of them in the newly remodeled Master Bathroom.
The Master Bedroom and Master Bathroom were revealed on television last night on the show, which aired on the Lifetime channel.
You can see my photograph being displayed in the Master Bathroom below...photo in the lower left. The photograph that Stephanie used was one that I took last year when Veronica and I were in Venice and it is a photo of the Bridge Of Sighs.
Thank you so much Stephanie for choosing one of my photographs in this exciting televised renovation project.
Click on the links below for more information on Stephanie Ballard and her business Covet Living Interiors....
One Of My Photographs Was On Television Last Night
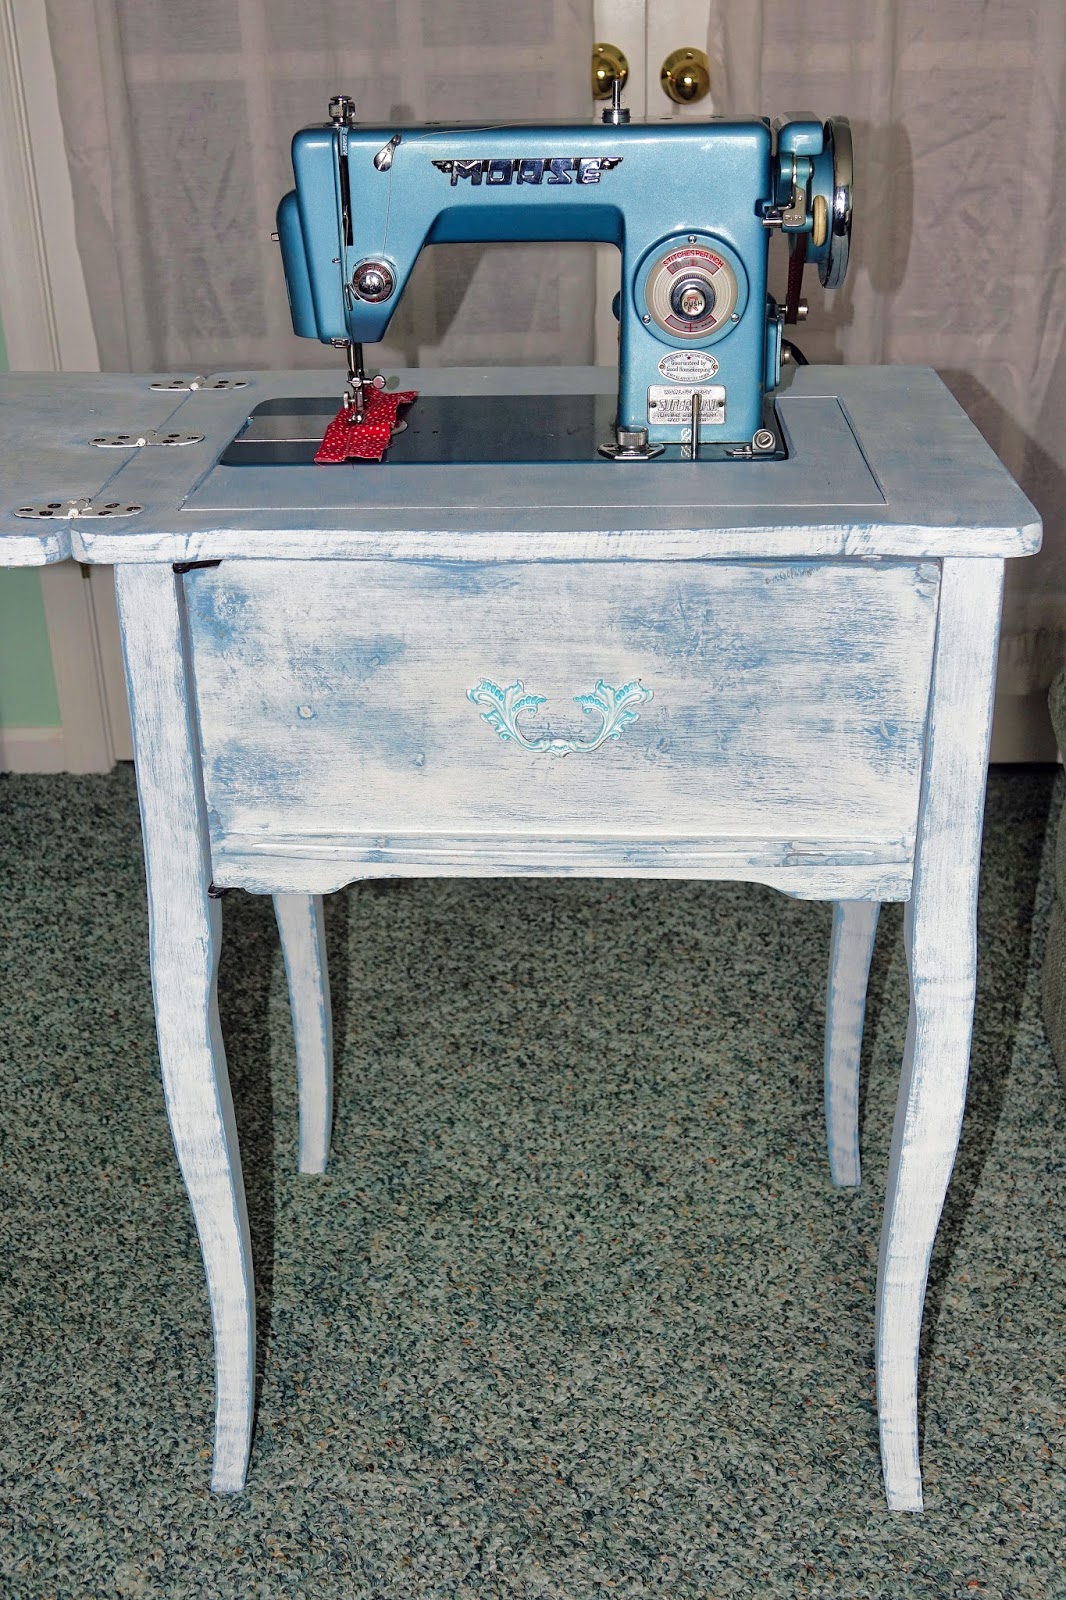
My Sewing Machine Cabinet Project Is Now Finished
I just put on the last piece of hardware onto Veronica's newly refurbished sewing machine cabinet and put her newly acquired sewing machine back into it. This was my latest project which is now completed.
And here it is.......


And here it is.......


Keeping Busy With Various Projects
These last couple of months have been fairly busy for me.
I started off helping my Dad weed through years of collected paperwork, magazines, books, receipts and many other assorted items. I found old checks and checkbooks dating back to 1956. I probably shredded enough paperwork to fill approximately twenty 13 gallon plastic bags. I would be sitting in a chair for hours on end shredding stuff.
Old paperback books were hauled to a local used book bookstore and donated.
A few items were donated to the Salvation Army and the rest was stored for safekeeping.
We lightened the load in his office by about 75%-80%
Then I switched gears and refinished one piece of furniture that I had refinished a couple of years ago. We wanted a different look and after completely stripping it down to the original wood and repainting it I was able to provide a completely different piece of furniture.
Then it was time to switch gears again and this time I cleaned up and totally went through the garage.
Some stuff was kept and the rest was donated to the Salvation Army. I ended up donating every piece of my garage gym equipment along with every single weight and anything to do with weightlifting. I did keep my new Total Gym system but other than that piece of equipment everything else was donated. There was no sense keeping any of it because with my back and shoulder issues there was no way that I would ever be using it again and if I did use it then it would have a further negative impact on my health.
I ended up rearranging and totally straightened up the garage to the point that we can now park 2 cars in it. With the Winter months coming up I wanted to make enough room in the garage so Veronica would not have to go outside to get into the car and neither one of us would be spending lots of time in the freezing cold brushing snow off of the car or scraping ice off of it either.
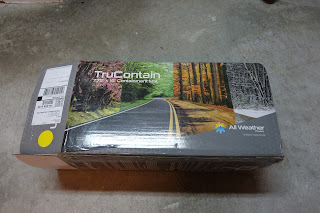
But because the car would be coming into the garage and most likely have some type of precipitation on it, I decided to invest in a containment mat which Veronica could park on in the garage and the mat would catch everything that was falling off or dripping off of her vehicle.
So after shopping around I purchase a TruContain brand containment mat.
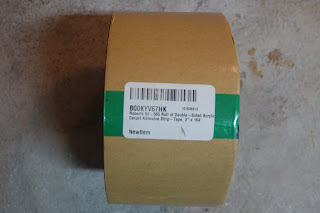
So now my next job was to put this 7 1/2' x 16' mat down on her side of the garage floor in such a way that it would not be moving around when she drove on it. I wrote the company that made the mat and asked for some guidance on a type of double sided sticky tape that would help this mat stay in place.
I was directed to try Roberts Double Sided Acrylic Adhesive Carpet tape which I turned around and purchased on Amazon.
After the tape arrived I spent approximately 4 hours applying the tape, stretching the mat so it would lay flay as I was installing it on the garage floor. At first I thought that I would be pulling this containment mat up after the Winter was over with but with the time and effort it took to lay it down properly on the garage floor, I decided that I was going to leave this mat down on the garage floor on a permanent basis.
The mat looks good and should do what it is supposed to do. This mat even came with a squeegee head. I have several rods that I can put the head on in order to get the water out of the containment area.
Another task that I have been working on and almost have completed is a vintage sewing machine and cabinet that has been in the family since approximately 1956. Veronica and I took this Morse sewing machine in to get it repaired and have some maintenance done to it. After spending approximately $100 the machine looks and runs well.
The cabinet that it was in was in the office that I had been working on cleaning and weeding through. It had been sitting in front of a window for years and the sun beating down on the wooden cabinet had wreaked havoc on the finish that used to be on the cabinet.
I sanded all of the stain and built up varnish or whatever protective coating that used to be on it and got down to the original wood.
Veronica and I went to Home Depot and she chose 2 different colors that i could apply one coat on top of another. I then would work on distressing the wood and paint, sand down some areas more than other areas so that the first coat I pained on, which was the dark coat, would peek out from the sanded down lighter color top coat. The finished effect is what I would call a somewhat distressed shabby chic look.
I am almost finished with that project and we are just waiting on a piece of hardware to be shipped to us so I can put the piece on and be done with that project. I will upload some photos of this sewing cabinet and the machine as soon ass the project is completed.
I am not sure what will be next on my project list but I am sure that I will come up with something.
Today I went in super early for my last of this round of Radio Frequency Ablation, this time on my left side of my lower back. With the completion of having both sides done again...3rd time I have had these treatments done, I should be with much less lower back pain for another 5-6 months. This length of time would cover me at least through February of next year, when we are scheduled for a trip to Rome, Italy. After that trip I will have to make a tough decision on what the next step will be to fix my back.


I started off helping my Dad weed through years of collected paperwork, magazines, books, receipts and many other assorted items. I found old checks and checkbooks dating back to 1956. I probably shredded enough paperwork to fill approximately twenty 13 gallon plastic bags. I would be sitting in a chair for hours on end shredding stuff.
Old paperback books were hauled to a local used book bookstore and donated.
A few items were donated to the Salvation Army and the rest was stored for safekeeping.
We lightened the load in his office by about 75%-80%
Then I switched gears and refinished one piece of furniture that I had refinished a couple of years ago. We wanted a different look and after completely stripping it down to the original wood and repainting it I was able to provide a completely different piece of furniture.
Then it was time to switch gears again and this time I cleaned up and totally went through the garage.
Some stuff was kept and the rest was donated to the Salvation Army. I ended up donating every piece of my garage gym equipment along with every single weight and anything to do with weightlifting. I did keep my new Total Gym system but other than that piece of equipment everything else was donated. There was no sense keeping any of it because with my back and shoulder issues there was no way that I would ever be using it again and if I did use it then it would have a further negative impact on my health.
I ended up rearranging and totally straightened up the garage to the point that we can now park 2 cars in it. With the Winter months coming up I wanted to make enough room in the garage so Veronica would not have to go outside to get into the car and neither one of us would be spending lots of time in the freezing cold brushing snow off of the car or scraping ice off of it either.
But because the car would be coming into the garage and most likely have some type of precipitation on it, I decided to invest in a containment mat which Veronica could park on in the garage and the mat would catch everything that was falling off or dripping off of her vehicle.
So after shopping around I purchase a TruContain brand containment mat.
So now my next job was to put this 7 1/2' x 16' mat down on her side of the garage floor in such a way that it would not be moving around when she drove on it. I wrote the company that made the mat and asked for some guidance on a type of double sided sticky tape that would help this mat stay in place.
I was directed to try Roberts Double Sided Acrylic Adhesive Carpet tape which I turned around and purchased on Amazon.
After the tape arrived I spent approximately 4 hours applying the tape, stretching the mat so it would lay flay as I was installing it on the garage floor. At first I thought that I would be pulling this containment mat up after the Winter was over with but with the time and effort it took to lay it down properly on the garage floor, I decided that I was going to leave this mat down on the garage floor on a permanent basis.
The mat looks good and should do what it is supposed to do. This mat even came with a squeegee head. I have several rods that I can put the head on in order to get the water out of the containment area.
Another task that I have been working on and almost have completed is a vintage sewing machine and cabinet that has been in the family since approximately 1956. Veronica and I took this Morse sewing machine in to get it repaired and have some maintenance done to it. After spending approximately $100 the machine looks and runs well.
The cabinet that it was in was in the office that I had been working on cleaning and weeding through. It had been sitting in front of a window for years and the sun beating down on the wooden cabinet had wreaked havoc on the finish that used to be on the cabinet.
I sanded all of the stain and built up varnish or whatever protective coating that used to be on it and got down to the original wood.
Veronica and I went to Home Depot and she chose 2 different colors that i could apply one coat on top of another. I then would work on distressing the wood and paint, sand down some areas more than other areas so that the first coat I pained on, which was the dark coat, would peek out from the sanded down lighter color top coat. The finished effect is what I would call a somewhat distressed shabby chic look.
I am almost finished with that project and we are just waiting on a piece of hardware to be shipped to us so I can put the piece on and be done with that project. I will upload some photos of this sewing cabinet and the machine as soon ass the project is completed.
I am not sure what will be next on my project list but I am sure that I will come up with something.
Today I went in super early for my last of this round of Radio Frequency Ablation, this time on my left side of my lower back. With the completion of having both sides done again...3rd time I have had these treatments done, I should be with much less lower back pain for another 5-6 months. This length of time would cover me at least through February of next year, when we are scheduled for a trip to Rome, Italy. After that trip I will have to make a tough decision on what the next step will be to fix my back.
Below are some photos of the projects that I have been working on:
This is the piece that I had refinished a couple of years ago and decided to change it up a bit

I banged the piece up a bit and sanded down some areas to give it a little bit of a beat up or distressed look to it


Below are pieces of the sewing cabinet that I sanded down to the original wood

I am currently almost done with this piece...further along than what you see here. I am waiting on one piece of hardware to arrive. Once it arrives and I put it on this piece it will be a finished project and I will post photos of it

This is the garage after a massive clean out and cleanup. Tried to maximize storage and side space so that there would be as much room as possible for 2 cars to be parked in there.


I hung 2 tennis balls from the ceiling so that we would know how far to drive the car into the garage and have enough clearance to walk around each car and have the garage door close properly

Here is our new TruContain containment mat

What comes in the box

Below is the recommended double sided carpet tape to hold the mat in place on the concrete floor

Below I am working on the proper placement of this mat on the side of the garage where Veronica would be parking her vehicle

I taped 4 boards together. After taping down the end nearest the garage door opening I placed the boards at top of the other end of the mat and started to roll up the mat around the boards and kept rolling until I got the the taped down edge of the mat at the garage door side. I then placed sections of tape in intervals within the middle 3rd of the mat. After peeling off the protective cover of the tape I used the roll up mat and boards to apply tension and stretch out the mat to get it to lay down taut and flat. As I unrolled the mat I would apply more tape in the center 3rd portion of the mat, the stretch and pull and push the tape onto the concrete. I kept this up until I had the entire middle sections if the mat securely taped down to the concrete. I then went around the edges, applied strips of tape and stretch, pull and push the tape down on top of the concrete.


This is the placement of the tape as I worked the mat deeper into the garage

Below is the finished product secured to the concrete flooring

Below is the raised edges that will contain any water, ice or snow that falls off of Veronica's vehicle while it is parked in the garage. I can then squeegee it all out

As soon as I get the sewing cabinet project completed I will post photos of it
Subscribe to:
Posts (Atom)


 Free website hit counter